Showing posts with label paint. Show all posts

Tuesday, 6 August 2013

New Floors in the Nursery

I'm a little overdue for this post, so, sorry. But there's floor down in the nursery now! And it looks really good! It's the same floor as in the dining room, but it looks so different in the nursery - you know, different lighting and such. Jason, Eric and I banged it all out in a few hours, and then my glutes and hammies hurt for three days. As a reminder we painted the walls and the ceiling in Behr's "Gentle Rain", colour matched to Dulux Xpert paint. And by we, I mean me, because Jason wouldn't have anything to do with it haha.


This is probably the closets representation of colour, it's a great warm grey and it works well with the South facing room. We've since changed out all the outlets and put in nice new grate covers, and all the base and trim should hopefully be going on this weekend, then it'll actually be finished, and just needing to be decorating. This room has come along the quickest, and I can't wait to start the decorating process.


The closet has also since changed appearance. I can't wait to get goin' on the reading nook, and closet organizer and start putting the three totes of baby clothes I've managed to amass over the years. I shared this sneak peak on Instagram of what the closet colour will be.


It's called Thermal Spring, by Sherwin Willaims. It's a pretty great teal colour, all dark and moody, it looks sweet in the closet, and I totally want to curl up in there with a book - too uncomfortable currently though. The room is coming together nicely, I'll update pictures of the trim and closet as soon as I can.

Thursday, 11 July 2013

And The Walls Came Tumbling Down!

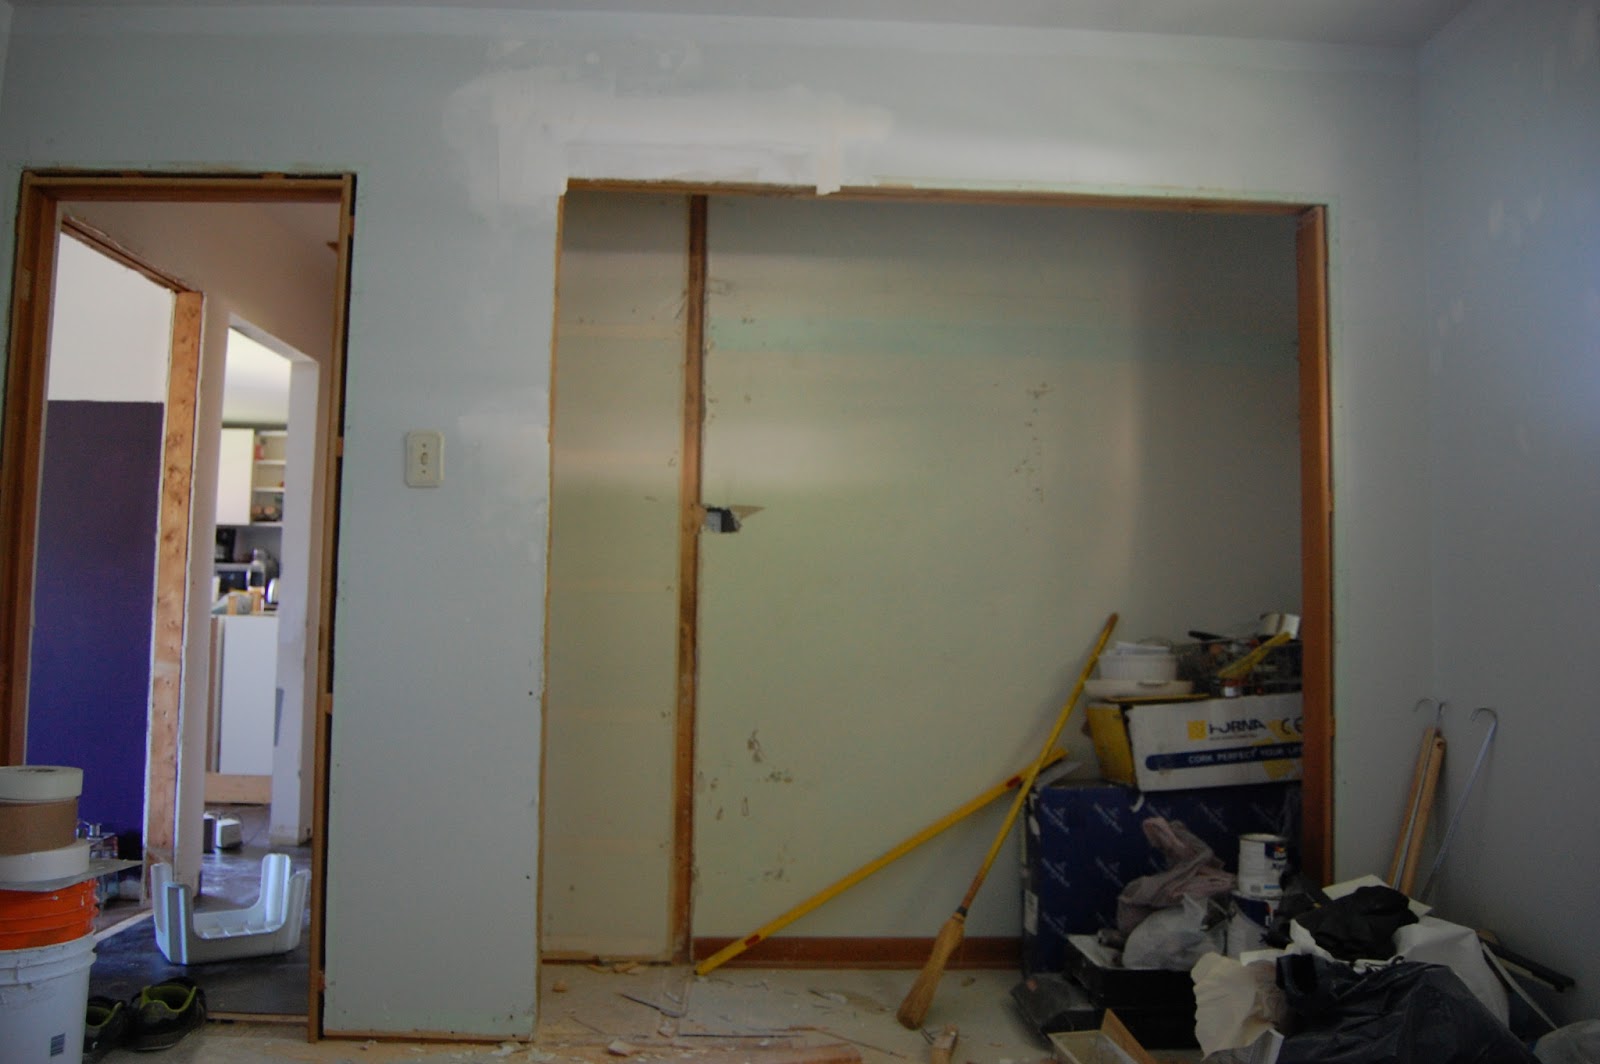
Do you remember when I mentioned a little while ago that we were planning on making the closet in the blue room/nursery bigger?  Well guess what I came home to on Tuesday?


A giant mess! I was torn between exasperation about the mess, and excitement that the closet is now bigger. There was this giant, naily, dusty mess in the hall and bedroom - I almost broke my neck climbing over it to get this picture haha - plus drywall dust foot prints all over the nice new kitchen floor. It was a little overwhelming, but the early stages of a demo project usually are.
    Jason did clean up his mess after he got home - he took the windows out, and threw everything out the gaping window less holes into the backyard haha. He had to build a header on the left hand side, and he put up some drywall and attempted to slap some tape & mud up. Now it's looking a little less overwhelming, and a little more like a closet.


I say he attempted to mud, because the mud was like soup. Because our air conditioner decided to crap out during the most humid and rainy weeks our basement was super damp and warm, apparently the bucket 'o' mud thought it was its job to act as a dehumidifier and suck up all the moisture in the air. So Jason was essentially trying to make the tape stay up with mushroom soup. Now that the weather has decided to back away a bit from Hades, and be a bit more reasonable, we're hoping the mud will thicken back up a bit, making like a bit easier.
   We still have to close off the old opening of the linen closet from the hallway, as well as a number of patches here and there, but Jason is motoring right along, and he tells me I should be able to paint by this weekend. We knew we wanted a light, warmer toned gray, something subtle so we could have fun with accents and accessories. We landed on "Gentle Rain" by Behr.


I really like the swatch, so I'm hoping it translates well to the walls. We need to get the paint up asap, so we can put the floor down and have it actually look like a bedroom for our final visit. (two weeks, yikes)

Tuesday, 18 June 2013

Bye Bye Blue Room

The room in the back corner of the house that has been destined to be the nursery since we moved in has been known to all as the blue room. Because it had a heinous blue carpet. Here's what it looked like on our final walk through (sorry for the craptastic dark, grainy cell phone picture)


That's what it looked like when we moved in, and that's what it's looked like since; although it has been kind enough to allow copious amounts of junk to squat in there over this past year and a half. As well as being our dumping ground, Kai used it as a literal dumping ground when she was sick. Blegh! So this room was in dire need of some lovin' before we could move a child into it. Those lacy granny curtains had to go, so did the stained blue carpet.

So, this weekend, while Jason (and Mitch) was doing so plumbing on Mitch & Miche's house they're building, us girls got down and dirty in the blue room. The boys enjoyed our innuendo breakdown of how we ripped that sucker out and got the room prepped. It was sweaty, and dirty, but it took us hardly any time at all to go from that, to this...


To this...


Yeah baby! It only took us about 45min to get the carpet out, all the tack strips up, the base & quarter round up, and all the staples up. And we got a great workout in haha. It was all the original baseboard and trim in there, and man oh man, were some of them stuck on the wall. They were attached with the biggest finishing nails I've ever seen! Some of the little pieces could only be coaxed off with some choice words.


The closet we're planning on making bigger (adding a little reading nook in there), so that's what the tape is up there for, to how big the opening will be. We're closing of the linen closet in the hallway to accommodate the larger closet. Our reasoning behind doing that, is we can't do anything to this room to make it bigger (it's not particularly small at 10' x 11'6", but it's not large) we would maximize the closet space, and make it much more functional to perhaps keep a dresser out of the room, allowing for a larger bed down the road. Also, we don't use the linen closet now (since we also have one in our bedroom), and we plan on adding a built-in to the bathroom when we get to renovating it, so anything we will need to store down the line will be housed in that.


So yay! Bigger closet in there, with a space where our avid little reader can go to chill out. (I used to love reading in my closet, or in the little nook that was just outside my bedroom door when I was little) I couldn't get this closet door off for some reason, I struggled with the other one when we were ripping up the carpet, and it fell on me, but this one just wouldn't give. So Jason has to remove that as well as the old baseboard heater unit, and I apparently missed some door trim haha, so that'll have to come down. But it's basically just take that boarder down, and spackle a few nail holes then we're good to paint. Can you see the swatches up there...I think I've got it narrowed down to four colours.


So, huzzah! Although now it seems rather hospital with the dated white floors and white walls, and the question was asked, is it still the blue room now that there's no blue? Probably, I mean the Lion King room was always the Lion King room. My sister and I will hopefully get the wallpaper down before Wednesday, and if I hurry up and make a paint colour decision, I can paint and we could potentially be ready to install the floors by the weekend.

Wednesday, 12 June 2013

Kitchen Files: Floor Beneath Our Feet

There's been some changes taking place in the kitchen as of late. Some small, small that make a huge difference, and some that are so monumental they're life changing. (Seriously I'm not exaggerating.) When you've lived without a proper kitchen for as long as we did any updates you do are touted as the greatest thing since sliced bread. It still makes me giddy to turn the lights on in there! Our final assessment was set for last Thursday so we were working our tail feathers off (we much rather would've been shakin' them) to get the kitchen floor in before then (as well as a few other smaller things). We finally got everything finished at about 1:30am Wednesday night (or Thursday morning if you will), and fell into bed without showering, and barely getting changed. Then before I even closed my eyes, it seemed like the alarm was going off, and we had to get up to finish tidying and a bunch of other things we were too tired to do the night before. Before we were able to get out of bed our social worker called to cancel the appointment because she was sick. I was annoyed for all of 30 seconds, because it meant we got to go back to sleep, and we honestly probably weren't ready for her to come anyway haha.

Anywho, we're glad she didn't cancel until the morning of, because we needed the meeting looming over our head to finish up the floor...


Tada! It looks great! We love it, when we first started we weren't sure if we really liked it, but the more that went down, the more we liked it. Which is a good thing, because this floor was a biotch to put down. It. Took. For. Ever! You had to flash the floor, and flash the tiles, then wait about a half hour for them to set before sticking them down. And the floor dried quicker, so it was a while before a good rhythm was figured out.


A gratuitous detail shot. And no, I couldn't have dusted the floor before hand, because I already have about 6 times. There's a lot of glue on the edges of the tiles (which is most of what you see here) that we're going to have to thumb off before we poly-seal it. (which is probably going to take a week because it's such a tedious job) Jason wasn't the neatest of gluers, but he put in a ton of hours on the new floor, so I can't complain.

Another update we did, that doesn't really change the look of the room much, but makes it a whole lot more functional came in the form of counters.


They still kind of look like ply-wood, but if you look closer, they're really...


Peel and stick tiles from the dollar store! Because we are having to post-pone our lovely quartz counter install due to a pesky leaky roof, I had to improvise. I wanted something wipeable, because I was tired of sweeping the counters. Yeah, sweeping, and we don't have a little hand held one, gotta get the ancient bristle broom up in there. Pain. In. The. Neck. (literally) So while this little counter update may not change the look of the room, it's umpteen times more functional, because no I can actually wipe up spills. Hoorrah!

So, like the dining room, it's still a ways a way from being finished, but it's much closer. Next step is some base and case and hole patching as well as some paint touch-ups. Plus organize and unpack all our kitchen stuff we still have downstairs.

Tuesday, 11 June 2013

Walkin' On Sunshine

And it sure feels good! (I have had this post sitting in the draft pile for close to a month, because I hadn't got around to taking pictures...I suck, I know. I'm sorry.)
The floor we put down really is like walking on sunshine! It looks fan-freakin-tastic! And it feels pretty fantastic under your feet. We've been living with the subfloor in there (and the kitchen) for almost a year. Not that you could really call it "living with" since I can count on one hand the amount of times we've even entered the dining room over this past year. Our friend Mitch came over to help us lay it, and he's such a rock star that it only took he and Jason three hours.


We put in an engineered hardwood that had to be brad nailed down, so I was planning for most of one day to put it in, thankfully that wasn't the case. Mostly because Mitch is a rock star, and can bang stuff out in no time, seriously if you're looking for someone to make your house a little prettier he's your man.


Hooray, so pretty! Then since I was a slacker and didn't paint before the floor went down, the room  still wasn't ready, so I had to paint. I love putting new floors down, they can totally and completely change the look of the room. So can paint though...take a look at this bad boy all painted up!

The hutch won't be staying like this, it's going to get a makeover.


Woot woot! It's a far cry from done, but it actually looks like a room now, instead of a dusty hell hole, so I'll take it. The colour looks great with the floor (I still have to do a third coat to even out a few places) and once we put up the base & case and install the picture ledge it'll look even better. We also took off the awning that was over the window about a month ago, and it's crazy how much more light it lets in the room. I'm so glad I finally painted, it's been like a year since I bought the paint, I've taken it to get shaken no less than three times since buying it with the intention to paint, haha. Moving the table in there just proved to me that it's too small for the space, it'll live in there though until we can find a table we like enough to buy, or get around to making one ourselves. But the room looks fantastic, even better than I was picturing.

Tuesday, 14 May 2013

Some Little Projects

I've been working on a few little things lately trying to summer things up a bit around here. Starting with the front garden. Last year we ripped out the brick at the front of the house to put a small garden, and it was ok. We had some blooming things (mainly because we planted things that already had flowers on them) but it was relatively sad haha. In the fall my mom and I planted a bunch of bulbs and I didn't really have high hopes for them, I'm a bit of a black thumb. I was always the kid who's stupid little bean never grew. That's why the only house plant we have is a succulent, because not even I can seem to kill them. But my garden out front looks great so far, and it's still early! So I had my mom and sister come out to help me weed, and we put up a little border around the garden, just using the bricks we'd pulled up.


I'm most excited about my rose bush. We transplanted it from the backyard last year, and it was pitiful, we figured it was dead, but it managed one bloom. This year it is looking WAY better, and I'm really hoping we get a few more than one this year.


There's still a few more plants and flowers I need/want to get in there, like some nice annuals, maybe some inpatients, and a few more begonias. There's some grape hyacinth in the backyard that we'll transplant up there as well as soon as we can (they're growing in the middle of the yard)


We also took off the ugly awning over the dining room window. It was one of those projects that take absolutely no time, and makes you wonder why on earth you hadn't done it sooner. And it lets is so much more light into the dining room now. We still want to take down those cedars, they're just too close to the house, but we want to wait until we're able to plant another tree first. Seems only fair since we already ripped out Bertha the giant bush. I also want to do some gardening/landscaping on this side, since it's not going to change at all, and it gets a bit more sun than the other side.


In terms of still summery, but less flowery things, I made some patio plates. I somehow have amassed a significant collection of plates, (I like to throw parties haha) so I decided to take the white plates I had and fun them up a bit. (they came from Dollerama) I started with a white plate and some Sharpie paint pens.


I was wanting to create something like the plates that Amanda from Love & Renovations scored from West Elm a while ago, I just loved them, but they don't sell them anymore, plus they'd probably be out of our price range anyway. So I figured why not try this Sharpie on white ceramics thing that's all over the place, and see if I could recreate a similar look.


Here's what I came up with. The colours are considerably more primary and bright, and a lot of my zig-zags don't line up all that great, but they're not too bad. I was a little disappointed with how they turned out, but Jase thought they looked good, and proclaimed they'd make good patio plates. So patio plates they shall become. The second plate I did looked better, and I devised a plan for the third one, so it should look even better. I've got 12 white plates kickin' around so I'll probably do it to all 12, and I've got an idea for salad plates, so hopefully I can get to those soon too.


Friday, 1 March 2013

Master Bath Progress

So, in case you haven't noticed, we have a little bit of a problem when it comes to finishing a project. We're great starters, we have started a number of projects, both big and small, but have yet to call one officially done. And I'm here to say...that we still aren't ready to call one done haha. The master bathroom has been easier to hide than the rest of the massive demo projects we've begun, so we weren't really focusing on it. OK, lets be honest, we haven't really been focusing on any project. We're like Dory, only without all the bright colours. Here's what the master bathroom looked like when we did our final walk-through before we pulled the trigger and bought the house...


Not bad really, the pinky/beige countertop and wall paper isn't really our cup of tea. But apparently it was the grown son's cup of tea, because it turns out he was the one who lived up there, not the little old lady. He obviously liked peachy colouring because literally everything up there was painted that. Because we're planning on making the bathroom up here considerably larger and more spa like, I was content to just live with it until then - or make some smaller changes. I was thinking of painting the tile (because it was also a pinky white), as well as the countertop (and possibly the floor if we couldn't find anything cheap) But then Jason did this...


Okay, so technically he didn't do this, my sister Meredith and I did...but he was the catalyst. He apparently heard me say I wanted to take the tile down - which certainly sounds like, "I think I'll paint the tile." right? Right? I guess it does, because one night he took it upon himself to see how easily the tile would come off. Not very easily. He broke about three trying to get one off, so then I was left with the option to try and match the tile and replace the few broken ones, or rip them all down and redo the bathroom. (Clearly he forced my hand, I had to redo it) So, I enlisted the help of Mer and she went to town on all those pink tile. Over a number of months we took off all the tile and the wallpaper. Then it stayed like that for many, many more months, before I finally got frustrated enough to do something about it. (That and all the Rona gift cards we got for Christmas)


Wabam! Looks considerably different eh? The floor is the awesome vinyl I talk about here, that I picked up from the ReStore for only $20! It looks fantastic, and it actually kind of feels like real wood, and the seams are hardly visible at all. You can also buy it from Home Depot if you're looking for something similar. We bought the beadboard from Rona with our gift cards. Since I was planning on painting it anyway, we went for the cheaper plain unprimed stuff rather than the white ready to go stuff. It was seriously like half price. Jase cut them, and I nailed them up. Then I filled the holes and caulked the seams, and attempted to paint.


I say attempted only because it was a major pain in the pituitary to paint this mother. I tried rolling it on with a super nappy roller, but that didn't really work, it didn't get in the crevices very nicely. (You can sort of see my first attempt to the left of the vanity) So then I had to try plan B. I used a paint brush to brush in all the crevices first, then went over with the roller. (I haven't photographed that yet) I still had to finger smooth down some of the lines where extra paint built up. But this beadboard takes the paint so nicely. I didn't prime it, and only had to do two coats and it looks pretty fantastic if I do say so myself. I painted the top half of the wall "Moody Blue" By Sherwin Willaims, colour matched to the Dulux Kitchen & Bath brand. Lets disregard my abysmal cutting job, I had intentions of painting the ceiling, but I ran out of paint. I usually use the Xpert brand of the Dulux paint, it's our favourite, but I thought I'd give the Kitchen & Bath a try, and it covered terribly. It's all splotchy, and streaky, I thought it was maybe the roller, but even the parts where I used a paintbrush look bad. I talked to the people there and they're giving me a new can (this time I'll stick with the Xpert), so I'll have to repaint the walls (and I'll do the ceiling at that time). I also painted the vanity black, and spray painted all the hinges and knobs silver. I also swapped out the uncovered heinous fluorescent light for something a bit more appealing (even if it has to be on the wall crooked). And because I know everyone is as big a fan of lists as I am here's where we stand:
  • take down tile & wallpaper
  • remove baseboard heater
  • remove trim
  • paint vanity & hardware
  • lay floor
  • install beadboard
  • paint (walls and beadboard)
  • change light
  • install ledge & hooks
  • paint countertop 
  • change out faucet (and possibly sink too)
  • change outlets/covers
  • hang art
I count four things left on that list (and since we're only going to replace the faucet/sink if Jase can snag them for (preferably) free) really there's only three things. WAHOO! 

Wednesday, 26 September 2012

Thoughts on the Water Closet

Here's our upstairs "master bath" when we moved in...


Not too bad in the grand scheme of terrible bathrooms. A creamy coloured square tile, and a basket weave pattern wallpaper that was pretty much the same fleshy colour as the bedroom. Since we're planning a huge overhaul for the bathroom and bedroom, to make a better master "suite", I wanted to do simple updates to tide us over for a couple years until we're ready to do the big stuff. I ripped off the wallpaper pretty the same time I took off the stuff in the kitchen - this stuff came off WAY easier. I was just going to paint the part where the wallpaper was, (and maybe probably the tiles), and we were going to replace the sink and faucet, because Jase would be able to get them for practically free (if not free). 
 Then (back at the beginning of the year) Jason says, "it's not that hard to take these tiles off, watch, they probably just like, fall off". Umm, yeah, that wasn't the case. He broke about three tiles, and the wall behind look terrible haha. We weren't able to chip out the rest of the tiles, they all seemed to cascade out in groups haha. So, down the tiles came - all thanks to my awesome little sister Mer! 
   And so we've been living with this God-aweful looking room for a while now...

 I know eh, looking at these pictures kind of makes me wonder what we were thinking by taking down the tile - then I remember I didn't want to take it down to begin with and I feel slightly better. Since the wall behind the tile is covered with glue, and is peeling, we're clearly not going to be able to paint, so we're just going to stick up some bead board to cover up that orange nasty, (that Mer says reminds her of a jungle? we tend not to question her anymore). I'm going to paint the top part of the walls, most likely this colour...


Which is Sherwin Williams "Moody Blue". I'll just paint the vanity black, with the sample tins I got for the bedroom, and we'll replace the sink and faucet with something that hopefully looks something like these...


We want a "vessel" type sink, the top one would be good, because it would fill the large hole that removing the old sink would fill and still sit flush with the counter. Where as if we went with something similar to the second picture it'd have to have quite a large base to fit over the whole, or it would have to be partly recessed, so all depends on what Jason can snag us, what kind of sink we'll be putting in.
   As for the faucets, we want something a lot sleeker than the clunker we have now.


Something like these would hit the spot quite nicely. Something tall and elegant, you know, like we both are hehe. 
   The kitchen is still our top priority, and since I'm back to work full time now, we'll have less time to do random side projects like the bathroom, but we'll slowly keep chipping away at it, so that by the time we FINALLY get around to having our open house/house warming (which we're planning now for December as like a one year anniversary to us moving in hehe :S) the master suite, along with the kitchen will be finite! 

In things are pretty much finished news, here's the upstairs hall in all it's newly painted glory.


I still have to cut in, and try and figure out how to cut in over the stairs (if anyone has any pointers, they'd be appreciated) All we have left to do here is get rid of that ugly blue brain globe light thing (that hangs about three centimetres away from the fan) and install the fire alarm that for reasons unbeknownst to us, has a holder, but has been MIA since we moved in. The gross carpet is exceptionally gross in the hallway (especially since I seemed to have spilled many drops of the dark gray paint on it haha) and I can't wait to get rid of it! But since grody-no-one-sees-but-us-carpet isn't that high on the priority list it'll stay like that for the next while.