Showing posts with label DIY. Show all posts

Wednesday, 15 January 2014

Light me Up

Now that the nursery isn't looking like this any more...

(I apparently sneezed while taking this picture? And it's the only before)

It's time to update that old square cover. In all honesty, that came down when I was painting, and I have no idea where it went, so we currently rocked the exposed bulbs for a while in there. (as well as most other places) Beautiful, I know, hence why we needed to update. I found a light I really liked, for a good price, except it was a table lamp...


It's by Allen & Roth, form Lowes, and at $74 it's within budget. It's not too difficult to hard-wire a lamp as an overhead fixture, so I figured we could do it. I made Jason come to the store to look at it, and he said he liked it, and agreed that it would be no big deal to throw it up on the ceiling. I saw somewhere a little while ago a similar fixture that the person had painted blue, which got my wheels spinning. To paint it, or leave it ORB. I was originally leaning more towards paint it, but once we got it in there, I really like the look of the oil rubbed bronze. It matches the new door handle and hinges, as well as the vent covers, and it also ties in to the dark patches in the floor. So I believe she'll be staying ORB.

It was super easy to do. All I had to do was take it apart - take the weighted base off, and the longer extension rod, and screw the shorted rod into the cover plate. Then we had to buy some bigger bolts and washers so the rod would be a bit more secure, and one of those chandelier, long screw thingies...

They're super cheap, but essential. This little baby is what is taking all the weight of the light, taking the pressure off the wiring. I don't have any pictures of the process, because Jason got a little chop happy when he was cutting the excess cord, and barely left enough room to wire it in, so it took four sets of hands haha. It's so nice to have a nice looking fixture up in at least one of the rooms hehe.


Tada! And look at that...a bonus sneak peek at the ceiling fun! I love it, and Jason really likes it too...and as an added bonus he keeps telling people I made it hehe.

Thursday, 11 July 2013

And The Walls Came Tumbling Down!

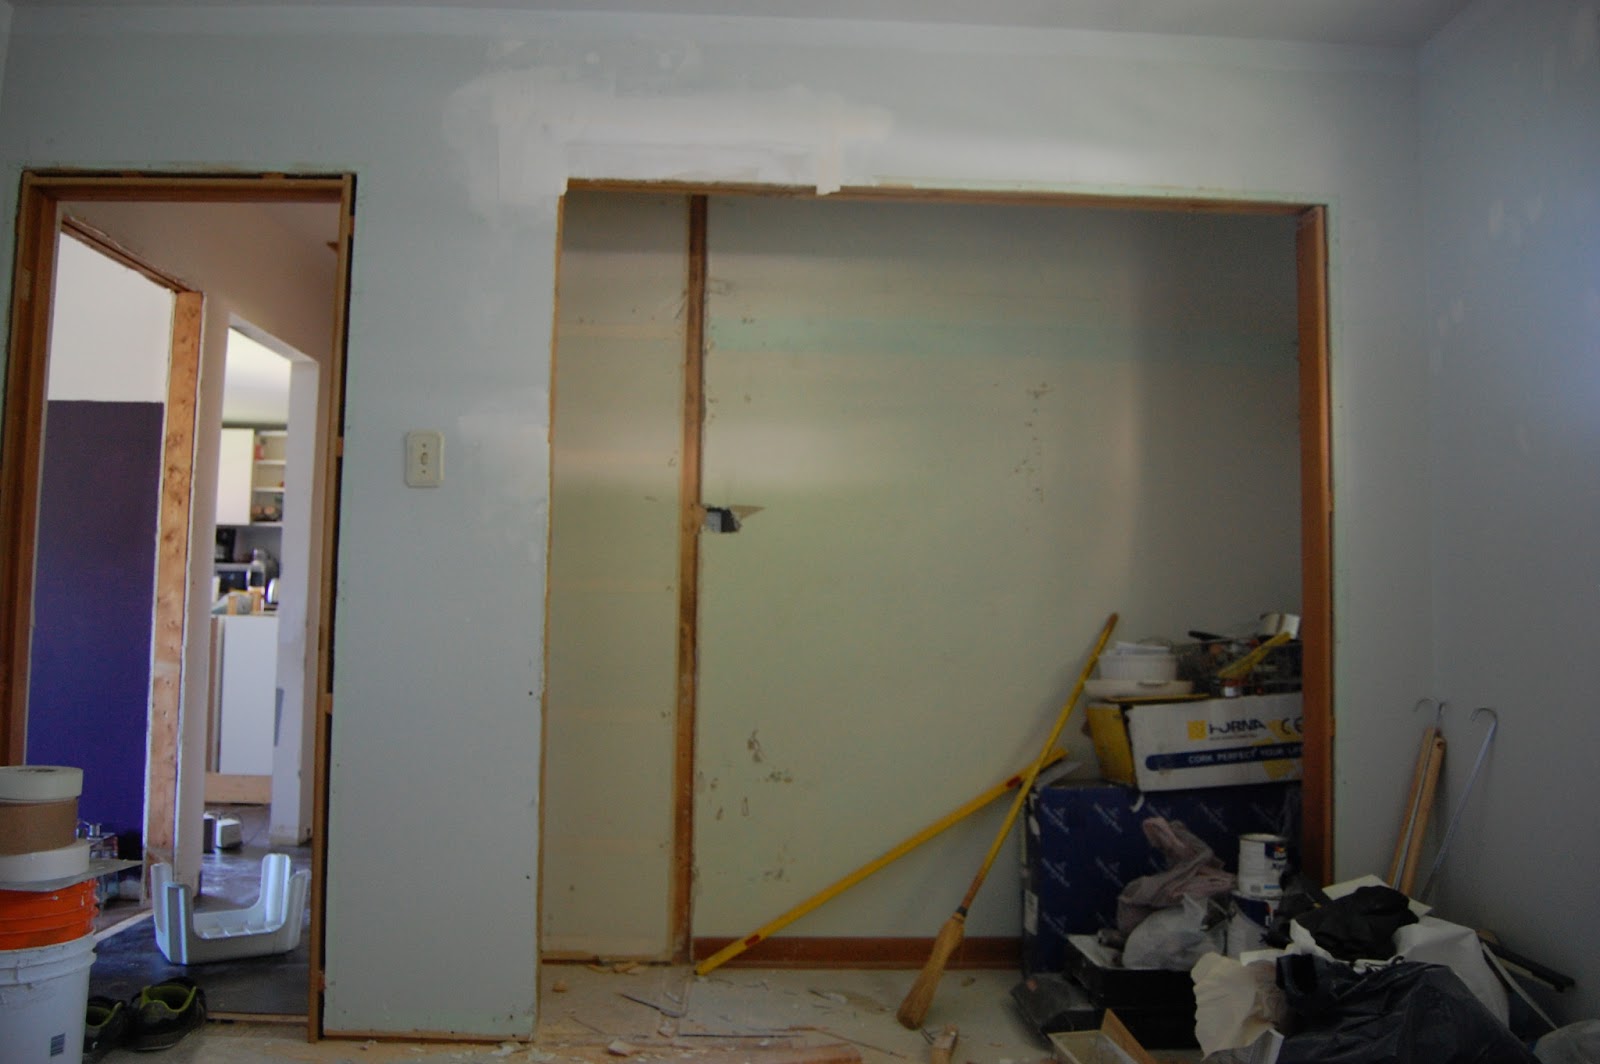
Do you remember when I mentioned a little while ago that we were planning on making the closet in the blue room/nursery bigger?  Well guess what I came home to on Tuesday?


A giant mess! I was torn between exasperation about the mess, and excitement that the closet is now bigger. There was this giant, naily, dusty mess in the hall and bedroom - I almost broke my neck climbing over it to get this picture haha - plus drywall dust foot prints all over the nice new kitchen floor. It was a little overwhelming, but the early stages of a demo project usually are.
    Jason did clean up his mess after he got home - he took the windows out, and threw everything out the gaping window less holes into the backyard haha. He had to build a header on the left hand side, and he put up some drywall and attempted to slap some tape & mud up. Now it's looking a little less overwhelming, and a little more like a closet.


I say he attempted to mud, because the mud was like soup. Because our air conditioner decided to crap out during the most humid and rainy weeks our basement was super damp and warm, apparently the bucket 'o' mud thought it was its job to act as a dehumidifier and suck up all the moisture in the air. So Jason was essentially trying to make the tape stay up with mushroom soup. Now that the weather has decided to back away a bit from Hades, and be a bit more reasonable, we're hoping the mud will thicken back up a bit, making like a bit easier.
   We still have to close off the old opening of the linen closet from the hallway, as well as a number of patches here and there, but Jason is motoring right along, and he tells me I should be able to paint by this weekend. We knew we wanted a light, warmer toned gray, something subtle so we could have fun with accents and accessories. We landed on "Gentle Rain" by Behr.


I really like the swatch, so I'm hoping it translates well to the walls. We need to get the paint up asap, so we can put the floor down and have it actually look like a bedroom for our final visit. (two weeks, yikes)

Thursday, 13 June 2013

Nursery Mood Board: Gold Glam

It's been a while since I posted a nursery mood board, and the last one that went up while being gender neutral, was still leaning more towards the masculine way of life. What can I say, that's how I roll, I'm not a girly girl. That being said, coming up with this super girly room was rather fun. The thing I encountered most with a "gold glam" nursery was the price of things. Holy Camoly can you pay a lot of money for certain things. (Which I guess is true for anything you do, it just seemed to crop up more with this board) So without further ado, here's my take on a glamorous girly nursery.


1. The colour is called Rainstorm and it's by Sherwin Williams, and I think it's what makes this room more palatable for me, because I'm really not a fan of pink. It's moody, and cozy, but with the pink and gold accents it's still girly.

2. An inexpensive "gold" pendant overhead light.

3. An accent wall with some randomized gold dots.

4. So they'll always know what letter their name starts with. Leave it as is, or spray it gold, or pink, or another fun colour.

5. A great gold foil message for the baby to learn.

6. Some sparkly hangers to display special things. Another simple DIY involving some gold (or any colour) sparkles or sequins, and some pant hangers.

7. Another message baby should learn. These could also be DIYed with gold paint, or gold leaf.

8. I love the Stella floor lamp, she's got vintage lines to her, but she's still modern enough to fit into this glam room. Plus she comes in a bunch of different colours, so she'd fit in many different spaces.

9. Because a gray elephant isn't cool enough, spray mama and baby in pink, and dip them in gold! This would be a super cheap and easy DIY, there's all sorts of animal toy DIY's out there.

10. A little floating shelf is great if you're short on space and have a ton of stuff to hold. Which lets face it, when it comes to babies, there's tons of stuff.

11. I've loved ampersands ever since grade 1, when I learned the word. So pass on the love with this little gold leafed one. Or if you're more into letters, they've got the whole alphabet there too.

12. Cute little cast iron golden birdy. Doesn't serve a purpose, but is pretty cute.

13. I love this gold faceted table lamp. It would work in a multitude of different rooms.

14. Nothing says glamorous like a mirror where you can narcissisticly check yourself 100 times before breakfast, so why not slap some on a dresser? While I'm not inclined to pay the outlandishly high price of the one from Pottery Barn, I'm not opposed to toning it down, and doing a DIY version, where you only mirror the front.

15. A simple white slipper chair is a neutral base to build some of the girlier accents off of, and is something that can grow up and be a reading chair in her room later in life.

16. Speaking of some girlier accents, a velvety pink round, a soft lace edged, and a subtle gold leaf are all good pillow options.

17. Some glitter garland strung above the crib announces this is where the princess sleeps.

18. This pink rug is made from recycled materials, and since there's a bit of white, and blue in it, it's not going to compete with the wall colour.

19. Lay to rest on some gold polka dotted bed sheets.

20. A lovely quilt with some hot pink bands.

21. After a long hard day of pooping and crying baby wants to rest her head in a modern white crib.

Tuesday, 14 May 2013

Some Little Projects

I've been working on a few little things lately trying to summer things up a bit around here. Starting with the front garden. Last year we ripped out the brick at the front of the house to put a small garden, and it was ok. We had some blooming things (mainly because we planted things that already had flowers on them) but it was relatively sad haha. In the fall my mom and I planted a bunch of bulbs and I didn't really have high hopes for them, I'm a bit of a black thumb. I was always the kid who's stupid little bean never grew. That's why the only house plant we have is a succulent, because not even I can seem to kill them. But my garden out front looks great so far, and it's still early! So I had my mom and sister come out to help me weed, and we put up a little border around the garden, just using the bricks we'd pulled up.


I'm most excited about my rose bush. We transplanted it from the backyard last year, and it was pitiful, we figured it was dead, but it managed one bloom. This year it is looking WAY better, and I'm really hoping we get a few more than one this year.


There's still a few more plants and flowers I need/want to get in there, like some nice annuals, maybe some inpatients, and a few more begonias. There's some grape hyacinth in the backyard that we'll transplant up there as well as soon as we can (they're growing in the middle of the yard)


We also took off the ugly awning over the dining room window. It was one of those projects that take absolutely no time, and makes you wonder why on earth you hadn't done it sooner. And it lets is so much more light into the dining room now. We still want to take down those cedars, they're just too close to the house, but we want to wait until we're able to plant another tree first. Seems only fair since we already ripped out Bertha the giant bush. I also want to do some gardening/landscaping on this side, since it's not going to change at all, and it gets a bit more sun than the other side.


In terms of still summery, but less flowery things, I made some patio plates. I somehow have amassed a significant collection of plates, (I like to throw parties haha) so I decided to take the white plates I had and fun them up a bit. (they came from Dollerama) I started with a white plate and some Sharpie paint pens.


I was wanting to create something like the plates that Amanda from Love & Renovations scored from West Elm a while ago, I just loved them, but they don't sell them anymore, plus they'd probably be out of our price range anyway. So I figured why not try this Sharpie on white ceramics thing that's all over the place, and see if I could recreate a similar look.


Here's what I came up with. The colours are considerably more primary and bright, and a lot of my zig-zags don't line up all that great, but they're not too bad. I was a little disappointed with how they turned out, but Jase thought they looked good, and proclaimed they'd make good patio plates. So patio plates they shall become. The second plate I did looked better, and I devised a plan for the third one, so it should look even better. I've got 12 white plates kickin' around so I'll probably do it to all 12, and I've got an idea for salad plates, so hopefully I can get to those soon too.


Friday, 10 May 2013

Operation Backyard Awesome : The Initial Plans

So, I mentioned that we were planning on tackling (at least part of) the back patio this year, and we're hoping to get started now that the weather's nice. We already ripped out the big bush, and cleared away a lot of other dead or dying plant life that would be in our way, so we're ready to think about the layout, and finalize a few things so we can dig the gas lines. This was my initial (super rough) idea that I came up with last year, more of a way to play with sizing. How, long and wide could we go, and all that jazz.


This idea doesn't work for a few reasons, but mainly it's just too small, and cramped. Here's a reminder of what the area looks like now. (minus Bertha the bush)


There are only four main things we're looking for with the patio:
  1. No more brick. We really don't like the brick. It's got copious amounts of weeds growing in between them, they're oil stained, and have massive dips in them from where the previous owners parked their cars. We'll be keeping the brick for the driveway for now, but it is our goal to eventually get rid of it, to put in something else.
  2. A dining area big enough to seat at least 8 off the back door.
  3. A designated "cooking" area close to the eating area. An outdoor kitchen if you will. (Since we plan on upgrading to a bigger badder gas BBQ down the line we'd like to run the gas line for it now so we don't have to make a mess of our pretty patio later)
  4. A lounge area with patio flame. We have a large outdoor sectional that will go around the patio flame making it like a conversation area.
  5. Must be made of wood, and must be pretty.
Not too big of a list of must haves. The first idea kind covered some of those needs, but not all of them, and it just seemed too small. We have a large back yard, so we want to patio to look like it belongs, and not be dwarfed. Here's what we  have in mind now...


It's got a little more oomph, and seems to hold it's weight better. See what I mean by we have a big backyard haha. And the blue spruce by the house is the only tree we have in our South facing backyard, so there's not much shade goin' on back there. You can also see, that this is why we need the help of a landscaper. We have a vast open space and no idea what to do with it. We need to put a fence up at the bottom of our yard to stop the crazy people from the stores and apartments above them walking through our yard. And we want to plant a few trees (we plan on planting one for every child we have) Anywho...lets take a closer look shall we?


Talk about a deck! This is definitely more of a statement, and definitely more our style and taste. Since we spend as much time as possible outside this idea covers our wants and needs better. It takes care of getting rid of the brick, it has a large eating area, under a pergola to provide some shade so our pasty necks won't get burnt (who am I kidding, we'll still get burnt - true story I got one of the worst burns of my life while sitting under a tree in the shade...I'm cool like that!) The pergola is attached to concrete pillars one of which turns into a bit of a bar area beside the barbeque. It's got a built in area for the BBQ, which is our designated cooking area. This area of the patio will come directly off the house, which means it'll be just over a foot off the ground, then we'll have a step down to our lounge area. This area has our sectional and the patio flame, and makes me want to sit there and roast marshmallows haha (and I don't even like marshmallows). We pulled this area away from the house so we're not blocking the basement windows, which we'll have to egress when we get to the finishing of it. It definitely covers our last point...it's pretty and made of wood! I think this is a winning idea for us, Jason is wholeheartedly on board with it, so I look forward to getting started.

  Just for comparison sake, the first mockup I came up with was 29' x 9' (although I suggested bumping it up to 11') whereas this one is 36' x 27' considerably bigger. We're not sure how much we're going to be able to get done this year, since we still have a bunch of things inside to finish, and we're hoping to get a baby by the fall. We plan on starting with the lounge area, since we already have everything for that, so we'll run the line, and set up a temporary situation, and we'll likely stake everything out, and plan our all our materials so we can have a budget in mind. We'll set things up where they would go, to play with size and layout, and make sure it does work well, because we learned the hard way that things don't always fit as nicely in real life as they do online or on paper. The best part of having a giant backyard, is you can decide to build a 900sq.ft. patio and it doesn't cut into where your imaginary massive pool is, so we can still go pretend swimming. I look forward to hearing what the landscaping company I talked to has to say about what kind of plants and trees to plant and where.

Friday, 12 April 2013

Spring has Sprung & Minor Tweaks

Before monsoon season hit, we were able to get a few things done outside in preparation for the patio, and it was pretty evident that spring had sprung. There were adorable little shoots popping up all over the place, and while I am by no means a gardener, I certainly can get excited about little signs of life growing from the gross, dead looking earth. A number of the bulbs and plants we planted last year in the front garden were coming up.


Aww, look at that cute little sedum guy. Still have to trim the dead stuff...have to wait for it to stop raining for more than five minutes though, which clearly doesn't look like it's going to happen.


 No clue what these little sprouts are...how I labeled things was stick a fork in the ground and trust that my elephant memory would do the rest. Alas, I can't even remember anything we planted in the fall (other than tulips haha)


Speaking of the tulips. The random friends growing in the backyard get more sun so they were a little more advanced. The older teenage siblings if you will.


Those tulips and this (hyacynth I believe) were growing where the myrtle was last year, so I'm not sure how long they were there, if maybe we just never saw them through the myrtle jungle.
 

Or perhaps it was those dastardly squirrels thinking that when I told them to "stay the *@#$ away from my bulbs" I actually meant, "take what you'd like, and disperse at your leisure". Either way, pretty colours should be on their way.


On a completely unrelated note. I thought I'd share the progress made on some dining room features. Remember Octa, the octopus chandelier?

 Well, she got a bit of a makeover...


Woot! She doesn't even look like the same Octa, eh? We're not 100% sure if she'll stay the glossy white, or if she'll change to a matte black, depends how nicely she plays with all the other pieces in the room. Her shades have jumped ship and she'll just sport a fun round filament bulb.
   The other update came in the form of some butt comfort. Here's what our dining chairs looked like before.


Brown with a pink velvety seat cushion. Now, there was nothing particularly wrong with the wood tone, it just didn't really go with the rest of the wood tones that are going to be in the room, we were going to have to re-stain them anyway, so since they needed to be sanded down regardless I decided to go with that I really wanted. And the best part is, my Nana wasn't even really upset that I decided to paint them. Thumbs up for previous owners approval.


Cool lines eh? (please disregard all the crap in the background, judging by the patio furniture I'd say this picture was taking about September/October haha)


Wabam! Looky looky...and this is only with primer, haven't even given them their final coats yet, then they'll look all glossy and beautiful.


And a detail shot of the new bum padding.


I love them. Jason thinks they look pretty good too. Not too bad for $7 a chair.

Friday, 22 February 2013

Slightly Less Boring

Which could have also been titled, "People Actually Live Here?" or "Hangin' in There" or a plethora of other dumb things. We've been in the house now for 14 months, and we have put nothing on the walls. Oh, wait, that's a lie...we did change out the thermometer for an electronic programmable one. But seriously, aside from all the clutter, you'd not think anyone actually lives here, because there's nothing but bare walls all around. Like I said the other day with the Pinterest Challenge, there's a few gallery's I've been wanting to put up. So I finally did. My sister was over and we couldn't do one of the projects we were planning on doing, so I got bored and slapped up some pictures in the hallway off the kitchen.
   I'm a ding dong and didn't take any before pictures, but let's be honest, it's a hallway, why would you take a picture of it? And really, it's not even a real hallway, more like two opposing walls, that I try to dress up and pretend is a hallway to make it seem more sophisticated. So....wabam!


 It's nothing much, just stuff I had lying around, most of the pictures are mounted on wood slices, and they were up on the walls in the apartment. Here's a closer, slightly less washed out rendering.


This is also after I changed out a few of the pictures so they weren't quite so matchy matchy, and because they were missing the cutest member of our family, who often drives me places.  Beside cute little, truck driving Kai, is a papercut I did a few years ago, I think I'm going to have to change out the background though, the grellow doesn't really go with everything else. Then there's the beautiful plastic doorbell cover. We're wanting to upgrade it to a nicer wood one, but at least the pictures and art sort of distract from it. The yellow paper with the shoes is from our wedding program that I made, it's just taped up there for now. The geometric thing clipped in the giant red clothespin is a little notebook I made quite a while ago too, but I like the paper and it sort of goes with the rest of the stuff up there. The painting I've had since a friend painted it for me in grade 9! He's been around the block this little fisherman dude, but this is the first time he's actually taken up real estate on a wall. That boot is just a newspaper clipping spot holder, until I can get a little canvas to slap a quote on and toss up there (to hide the massive screw sticking out of the wall). It looks pretty good for about 10 minutes of work and absolutely no money, although it does sort of emphasize how crooked the light cover is. There's very few straight, level electrical boxes in this house and it drives me bonkers!
   Hooray for things on the wall that let you know who lives here!

Wednesday, 20 February 2013

Pinterest Challenge Time

It's that time of year again. The Pinterest Challenge that Katie and Sherri put on, and I always say I'll partake in, then totally drop the ball and feel all guilty. Well not this time! I do proclaim that I will finish at least one thing that I've pinned that I've been meaning to do for ever.


I've been on Pinterest almost since it's inception so I've amassed quite a significant amount of ideas, and projects I want to accomplish. Here's some things I want to get done for this challenge.


Some fun, bright, string art for the art area above the new dresser that's going in our bedroom as soon as I finish refinishing it.


A fun geometric pendant also for the bedroom, to replace the standard ugly one in there.

There's also a bunch of different art that needs to be hung in various places, it's just a matter of deciding how we'd want to do it...

http://www.shelterness.com/pictures/25-cool-ideas-to-display-family-photos-on-your-walls19.jpg  

 (source)

  Instagram wall
 (source)

 (source)

There's a bunch of other things that I'd love to try and get done for this challenge, but that's been my problem in the past. I start too many projects, then never get any done, and end up with a ton of barely started, or half finished projects lying around forever. So my goal is that by narrowing it down to only a few things (none of which I should have to go buy anything for) I should be able to get at least one thing done haha.
And if by some grace of God I manage to get everything done I'll be that much closer to a completed bedroom, which makes me happy!
   So, hopefully next Tuesday I'll have some more fun, completed projects to show off.

Friday, 15 February 2013

One of These Things is Not Like The Other

What do an octopus chandelier, (ok so she's not really an octopus, but she's got 8 legs so close enough)
vinyl floor,

beadboard,

a hutch,

and dresser...
all have in common? Well if you took the bead board out of that equation they'd all be second hand - woot woot! But, really it's that they all should be getting some attention next week. We are long overdue on a number of projects, and one of the unexpected perks of going through the adoption process is it's forcing us to finish a number of house related projects, before the judgement lady comes, and gives us a gold star and tells us we can start our kid  shopping. No longer will things sit in the corner of a room, collecting dust, trying to see how much we can balance on top of them. These poor neglected children will finally get to see the light of day, and have their chance to shine. (That's right, I'm talking about you Octa and Hutch - get ready!) Octa and Hutch, will both be getting a nice crisp white makeover, and will both be residing in the dining room (that is if we ever get it paint ready in there)
   As for the vinyl floor and bead board, we're going to get slap happy with those friends, and throw um up (and down) in our master bath, so it doesn't have to look like this anymore!
it's like that hillbilly cousin you're embarrassed to admit you have. I've already painted and changed out the light fixture, so once we do the floor and bead board we can pretty much call this room "done". Or at least liveable until we can tackle the big makeover we have for it a few years down the road.

Lastly, we have the dresser. I've been searching for a low, long dresser for our bedroom since we moved in. I'd been searching kijiji, and pretty much every thrift store within a 75k radius to find one that fit the bill. I wanted either french provincial or midcentury, with at least 6 drawers, solidly built, and preferably something that was under $200. I was beginning to think that what I wanted was like the elusive flying unicorn that Jason swears exist, and was starting to lose hope. Then, he came to me. I asked Jase's mom if she could keep an eye out on the swap shop that she has access to, and a week later she sent me that picture. He's quite handsome isn't he? I will be giving him a hair cut, because we don't want the mirror attached, and a full body makeover.

So that's what my week is shaping out to contain, hopefully I'll get that, and more done, so I'll actually have things to share.